Aurorax
Personal Portfolio WordPress Theme
- created: 05/03/2018
- latest update: 05/04/2018
- by: SoftHopper
- email: softhopperbd@gmail.com
Thank you for purchasing our theme. If you have any questions that are beyond the scope of this help file, please feel free to email via my user page contact form here. Thanks so much!
Installation
Server Requirements
- max_execution_time = 300 (900 if you are using GoDaddy)
- max_input_time = 120
- memory_limit = 128M
- post_max_size = 15M
- upload_max_filesize = 8M
- PHP Version Minimum 5.4
How can this be checked?
Install theme
After you download the package from ThemeForest, unzip it. You'll see a file aurorax.zip in the theme folder, which is the main file that needed to upload and install. You can either choose to upload and install the theme using WordPress theme install or use FTP function.
Install theme using WordPress install function
- Go to Appearance >Themes and click Add New
- Select Upload
- Click Browse and select the aurorax.zip file
- Click Install Now
- When upload and installation progress are completed, click Activate, or go to Appearance>Themes and activate aurorax theme
Upload and install using FTP
If you get any fail when installing the theme by Wordpress install function, we recommend to use FTP:
- Unzip aurorax.zip, you'll get a folder aurorax
- Use an FTP client like FileZilla and upload that folder to wp-content/themes folder on your host
- Go to Appearance >Themes and activate Aurorax theme
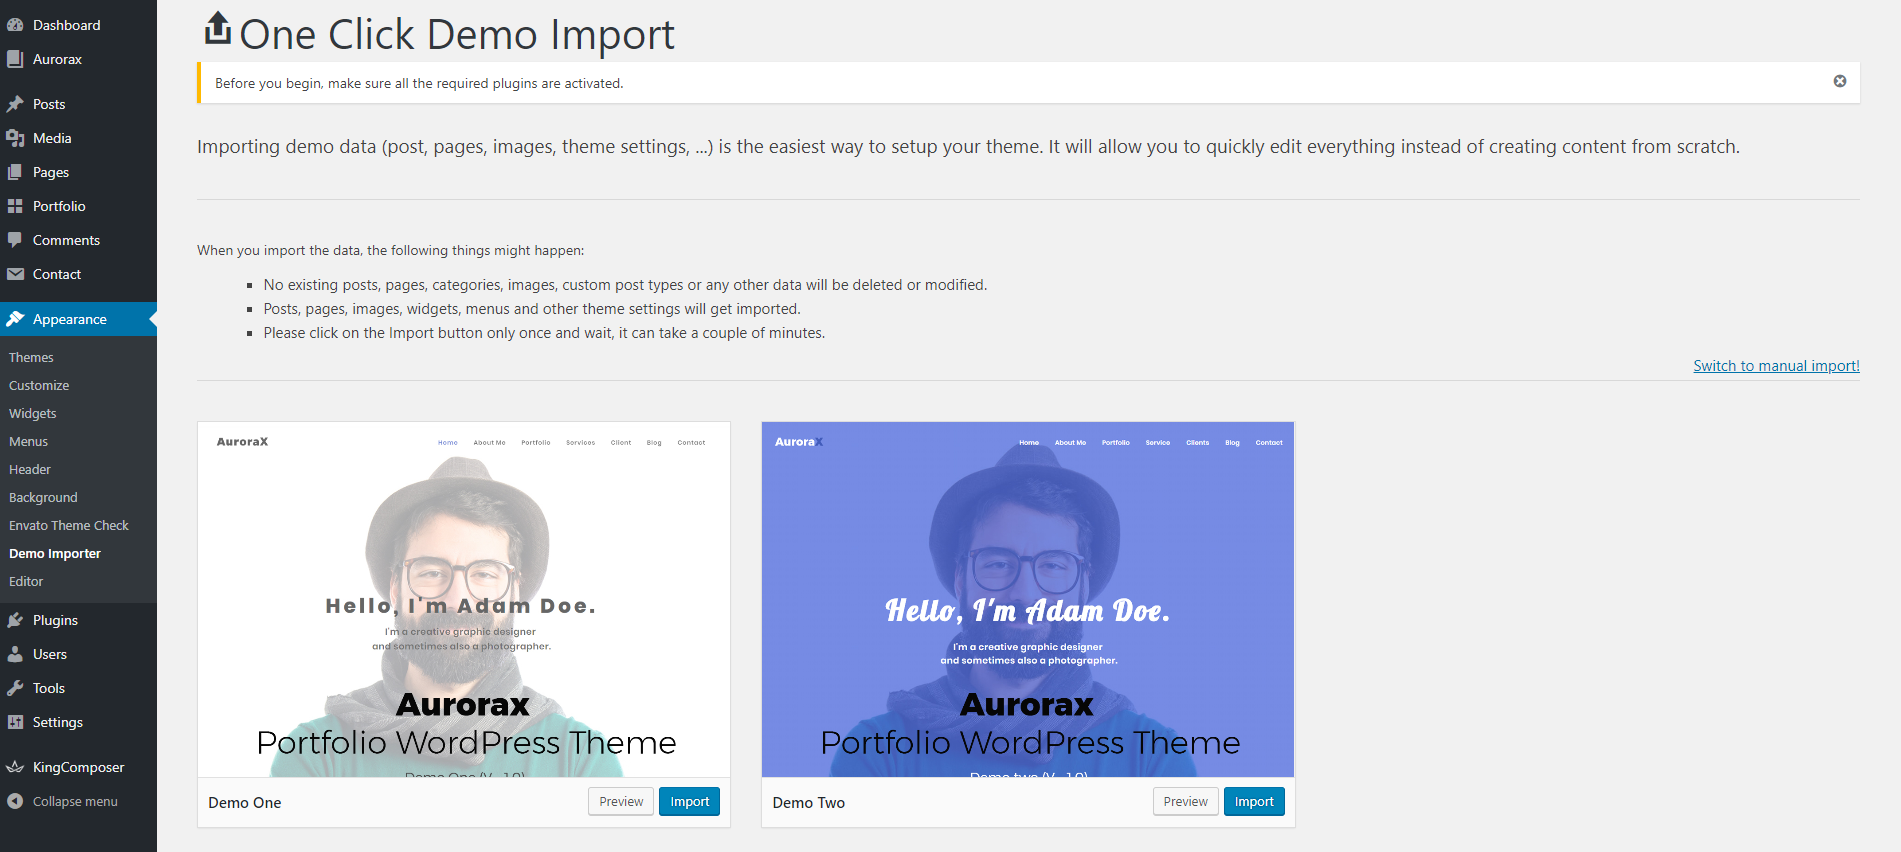
Install demo or required plugin
After activating theme Please install all recommended plugins. It will help you to website ready in just a few steps.
Then choose a demo importer from Appearance > Demo Importer and click on import. It also will take a couple of minutes to install full demo content. So wait till all the process when complete.
How to update permalinks
1. Go to Settings > Permalinks from Dashboard
2. From Common Settings Section Select Post name radio button
3. Then click on Save Changes
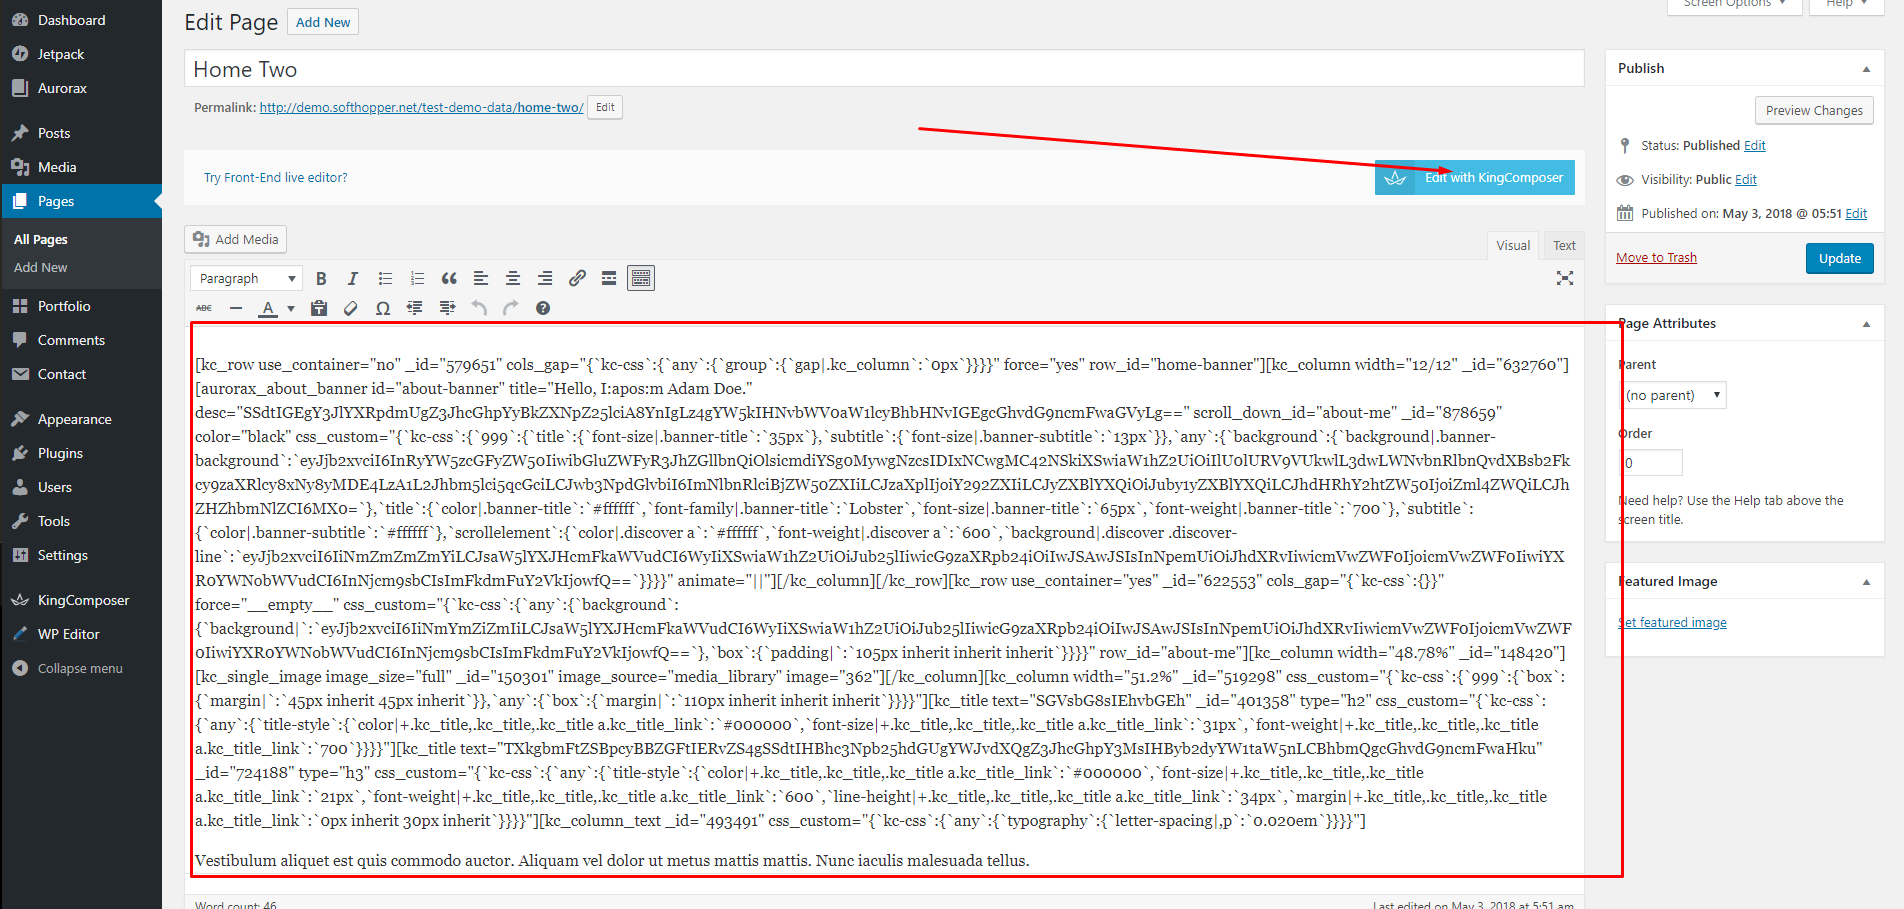
Additional Issue:
if you see that after import demo content page not load correctly go on page edit the page, click on Edit with kingcomposer Button then save it. As like this -
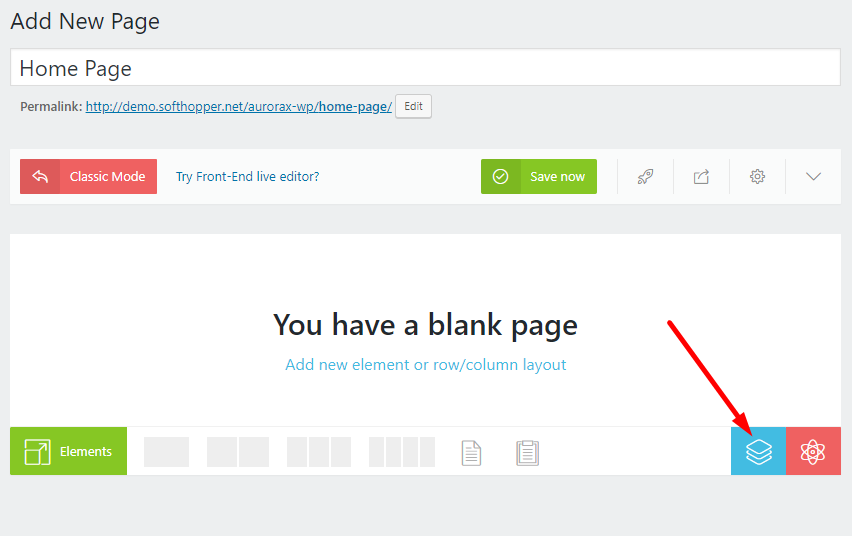
Setup Home and Blog page manually
If you would not want to install auto setup. Then you need to create Home and Blog page manually.
Step One:
1. Create a page keeping name Home and add you're essential king composer shortcode.
2. Create a page keeping name Blog with no content.
Step Two:
1. Go to Settings > Reading from Dashboard
2. From Front page displays Section Select A static page (select below) radio button
3. Select Front page: as Home and Posts Page: as Blog from the dropdown list.
4. Then click on Save Changes
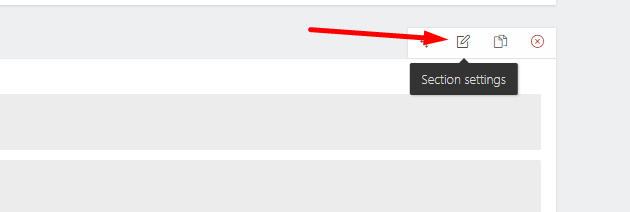
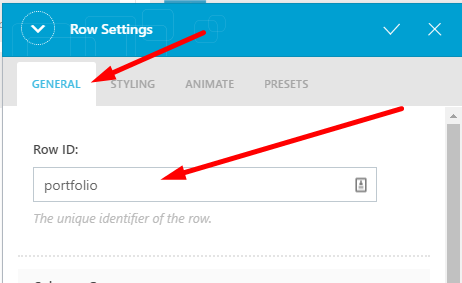
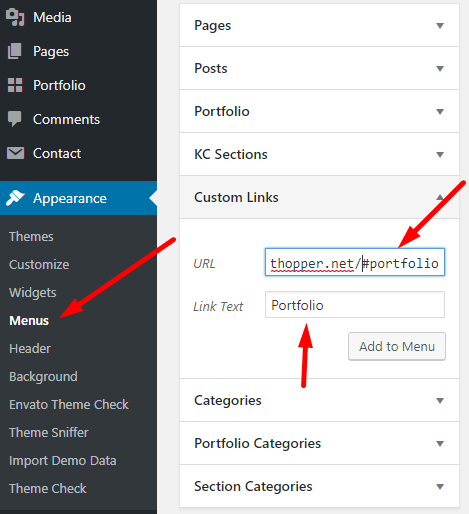
Setup One Page Navigation Manually
If you would not want to install auto setup. Then you need to set up one-page nav manually.
1. Give Row ID in section settings of King Composer Shortcode
2. Then go on menu Create a Custom Links
3. In Custom Link of URL field give Row ID with "#". like #porfolio.
Note: Before you adding #porfolio this, add your site URL so that from other page users can go to that section
4. Add to Menu
Like the following screenshot.
Section Settings Icon
Section Settings Popup
Custom Menu
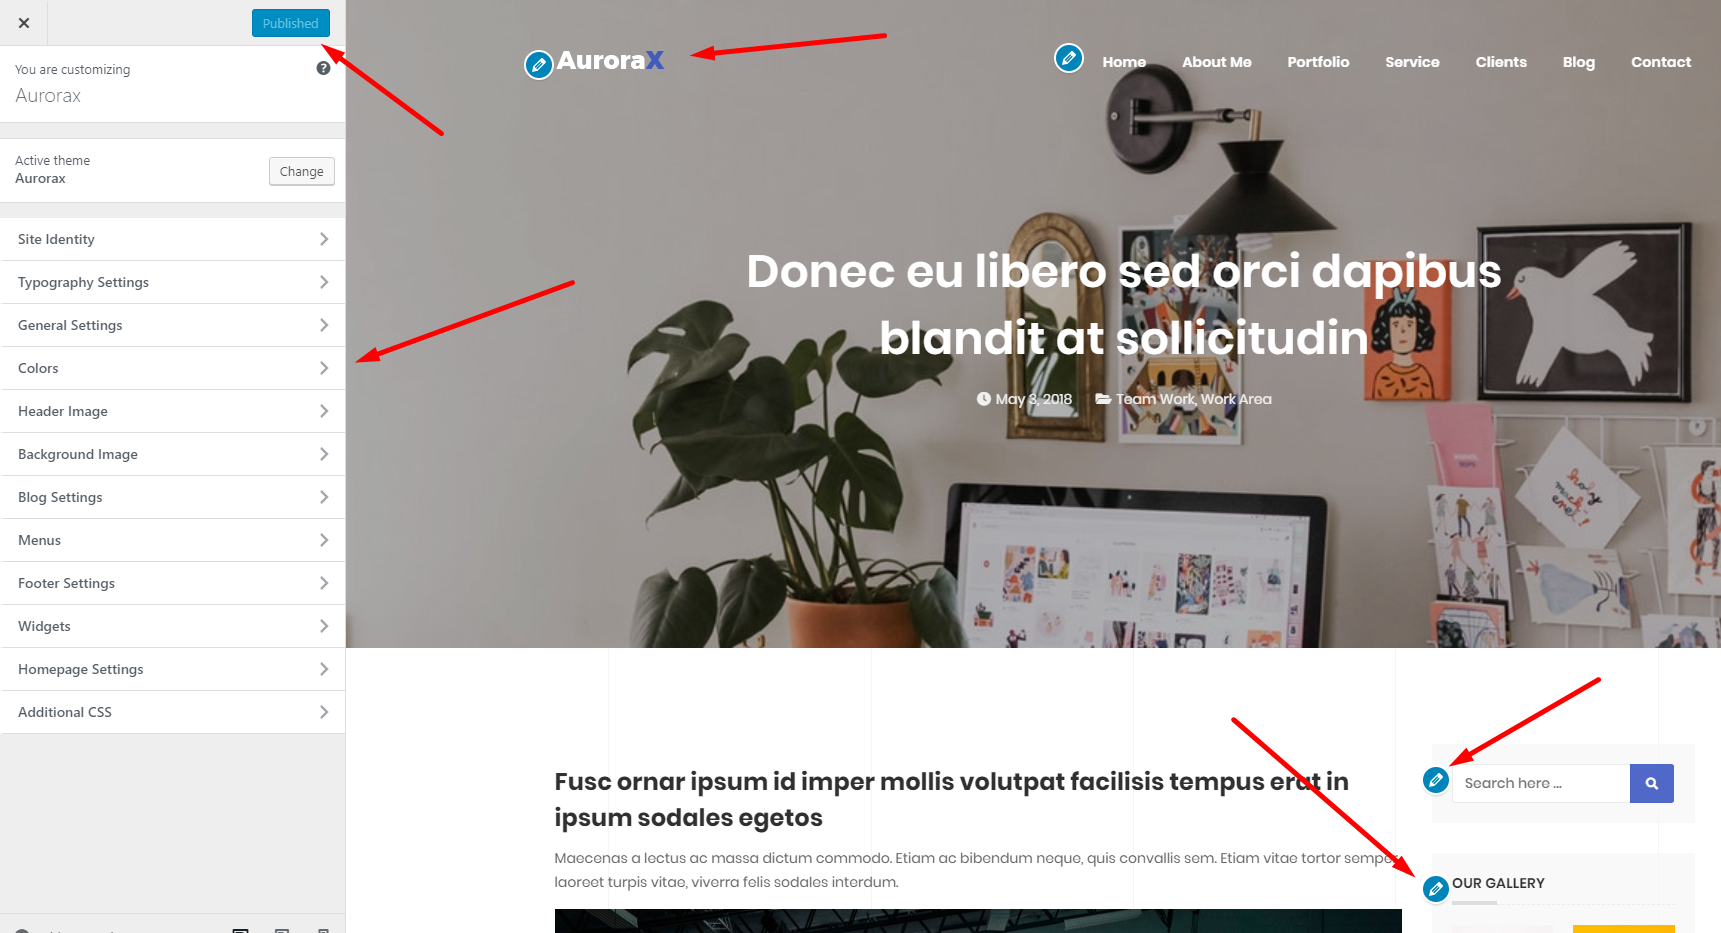
Customizer Settings
Aurorax comes with a fantastic a powerful admin panel from where you can update almost every part of the theme. Just go to your WordPress admin panel and click on Appearance > Customize
From the Appearance > Customize, you can manage overall General Settings, Typography, Header Section, Footer Section etc The Customizer panel looks like the screenshot. I think when you see every section of this options panel you will understand. So I do not describe everything parts by part here.
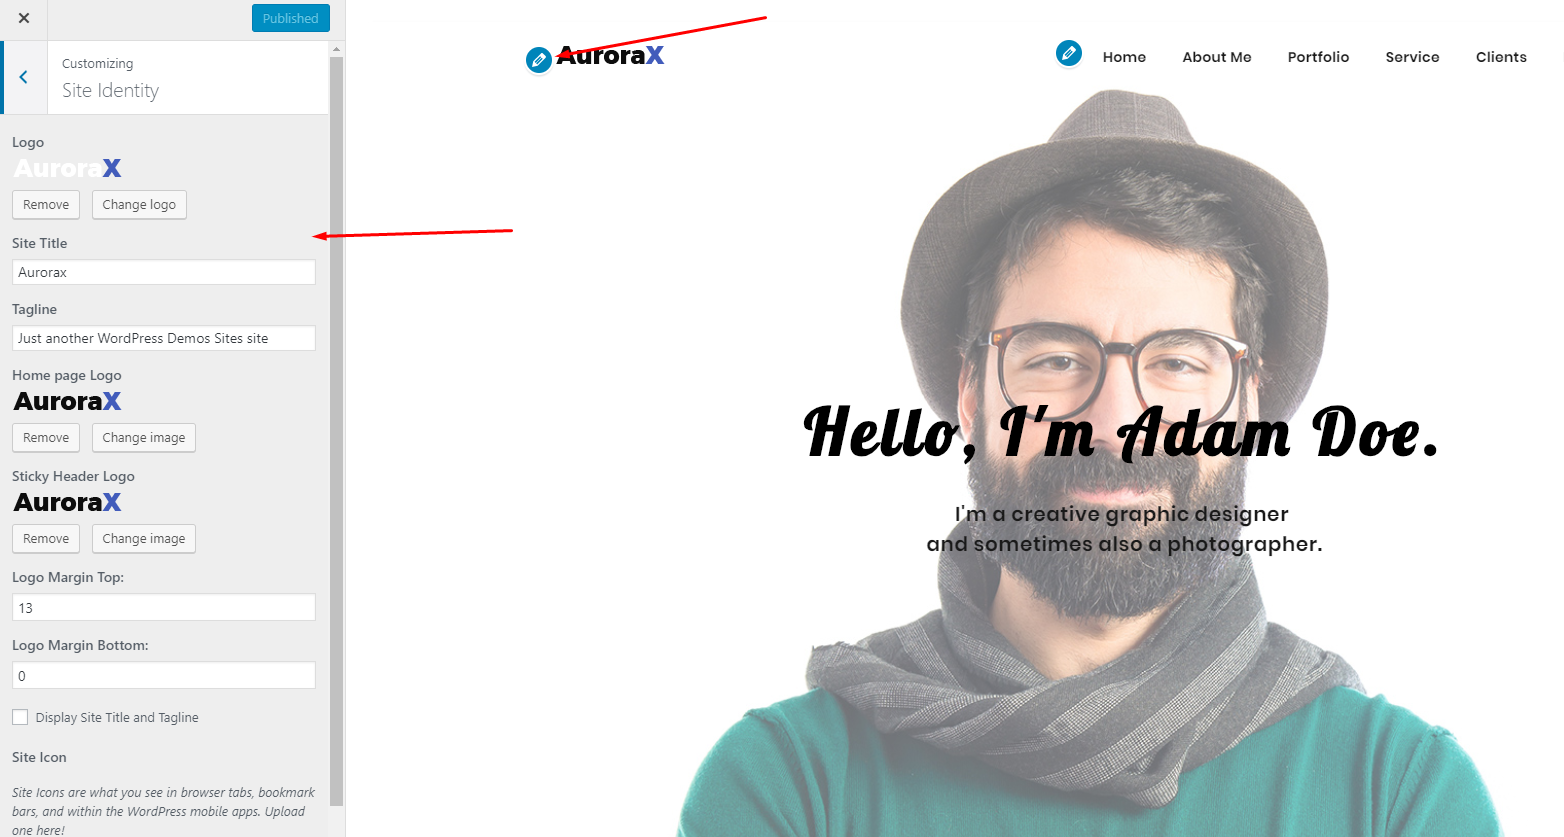
Header Section
How to manage Header Section
From admin dashboard go to Appearance > Customize
Header Settings Look like the screenshot, You can manage header settings from here
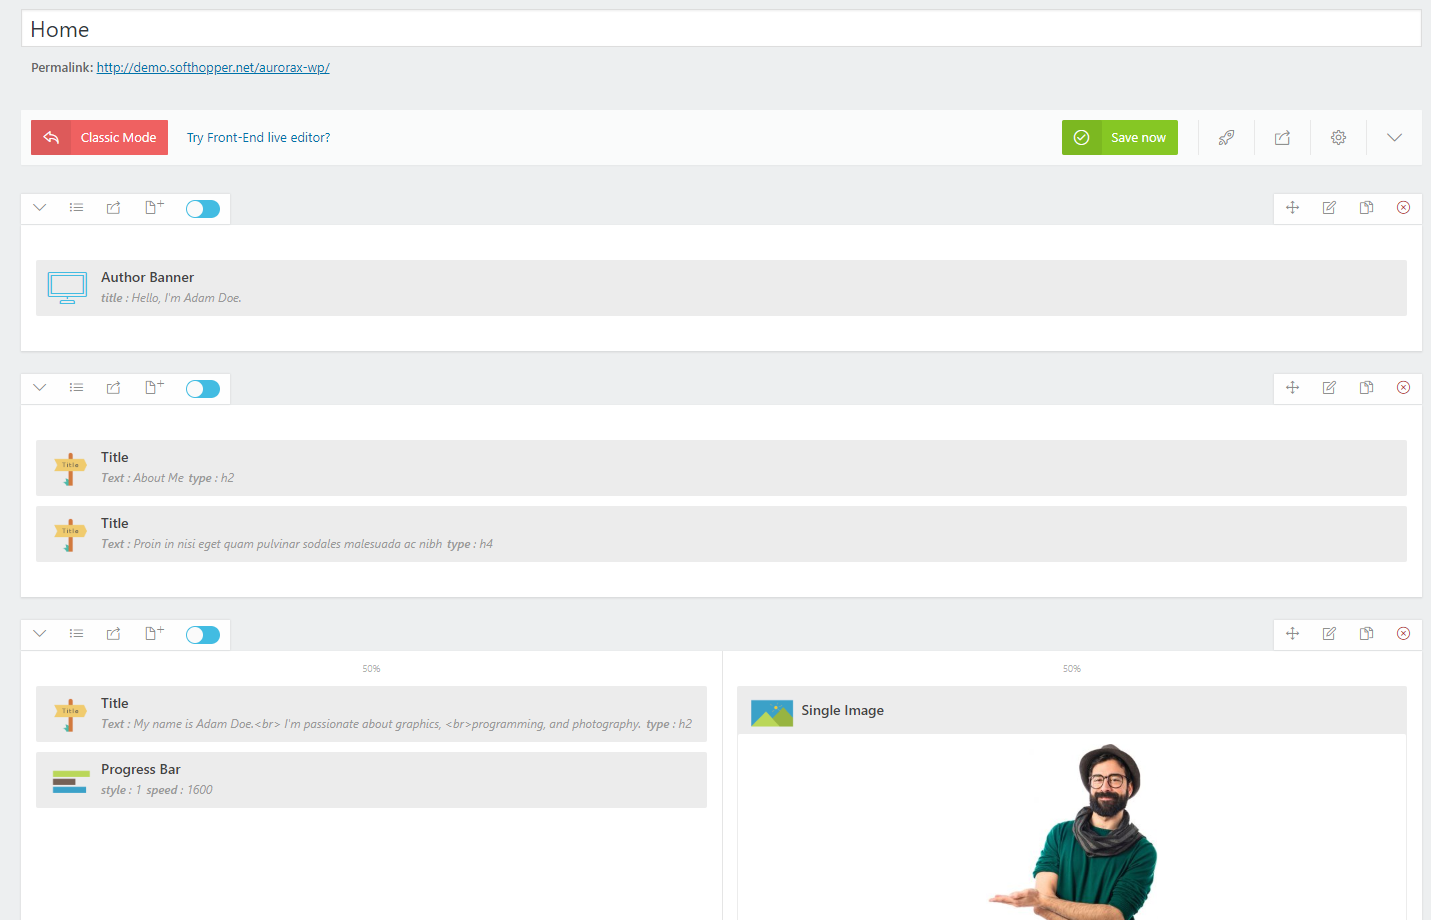
Home Page
How to manage Home Page
After importing demo content. Go to Pages > Home
All home page content are here look like the screenshot, You can manage home page content from here
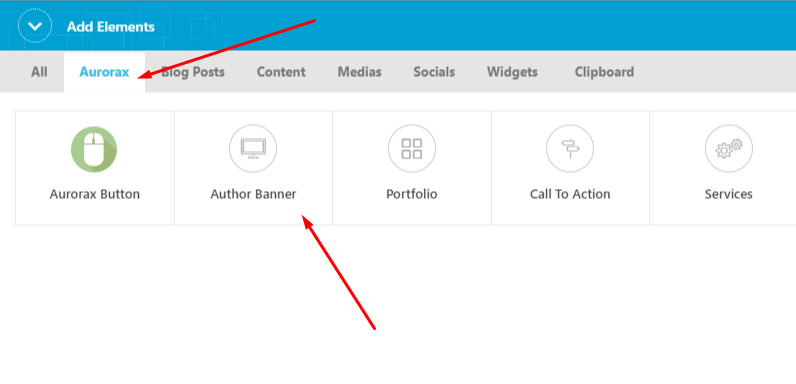
Shortcode Overview
How to manage shortcode
In King Composer, there are a lot of built-in Shortcode. But especially for this theme, we created some extra custom Shortcode.
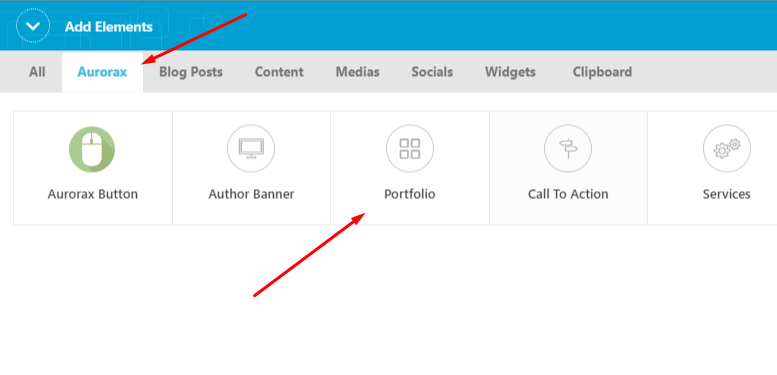
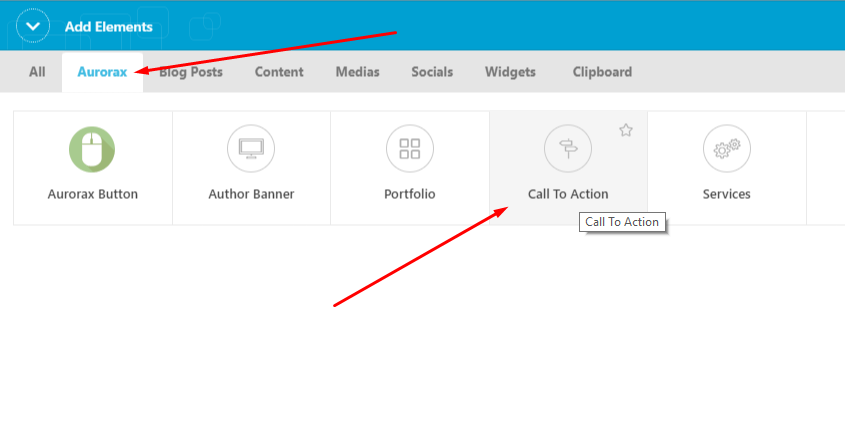
All Shortcode And Live Preview
1. Author Banner
After demo content import some cotent doesn't look as like demo, So for that issue you can fixed this content as like this example video.
Or

2. Portfolio

3. Call To Action

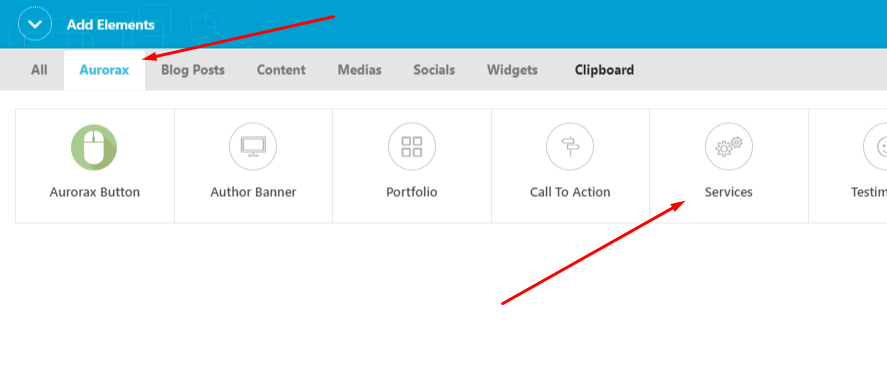
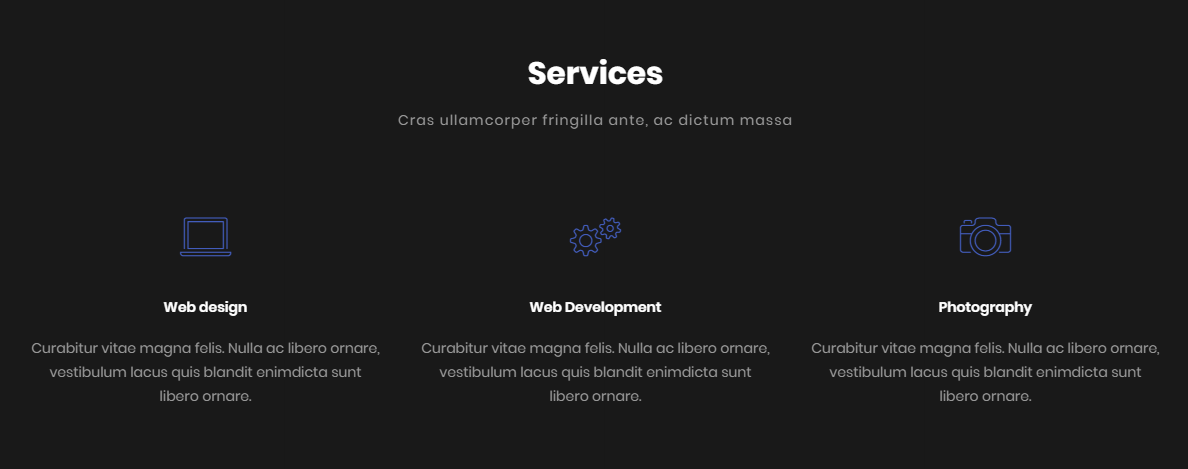
4. Services
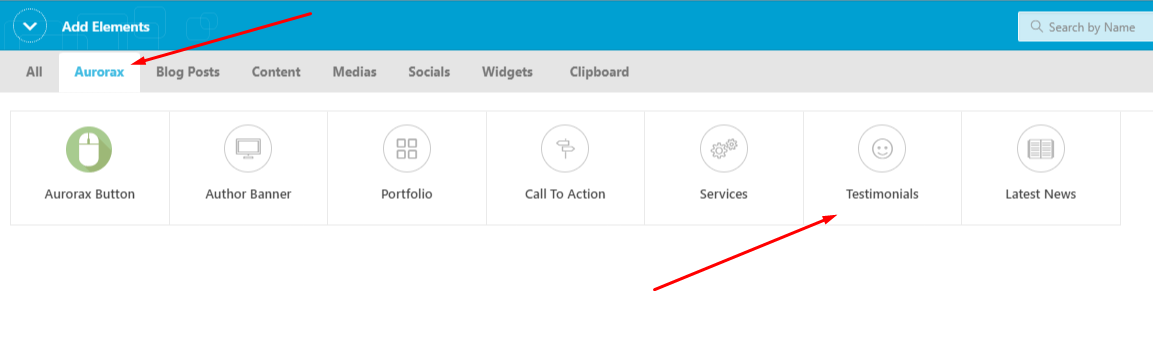
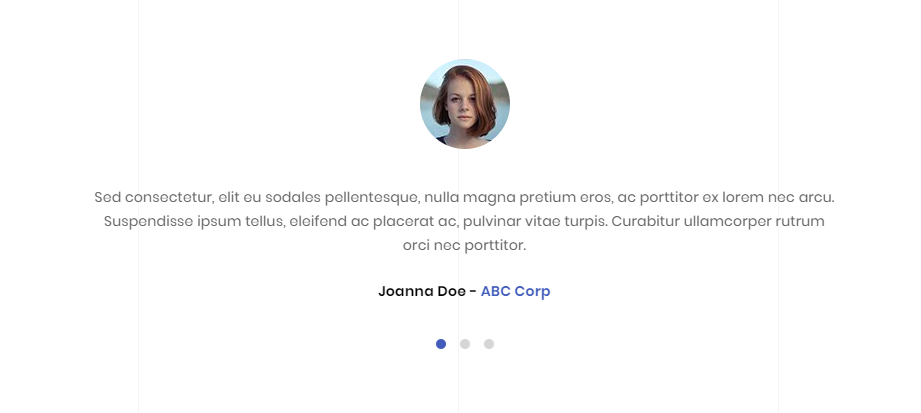
5. Testimonials
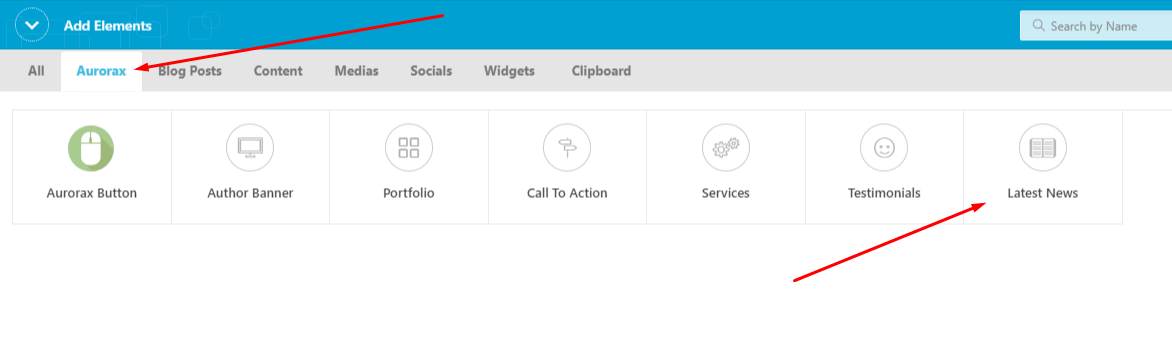
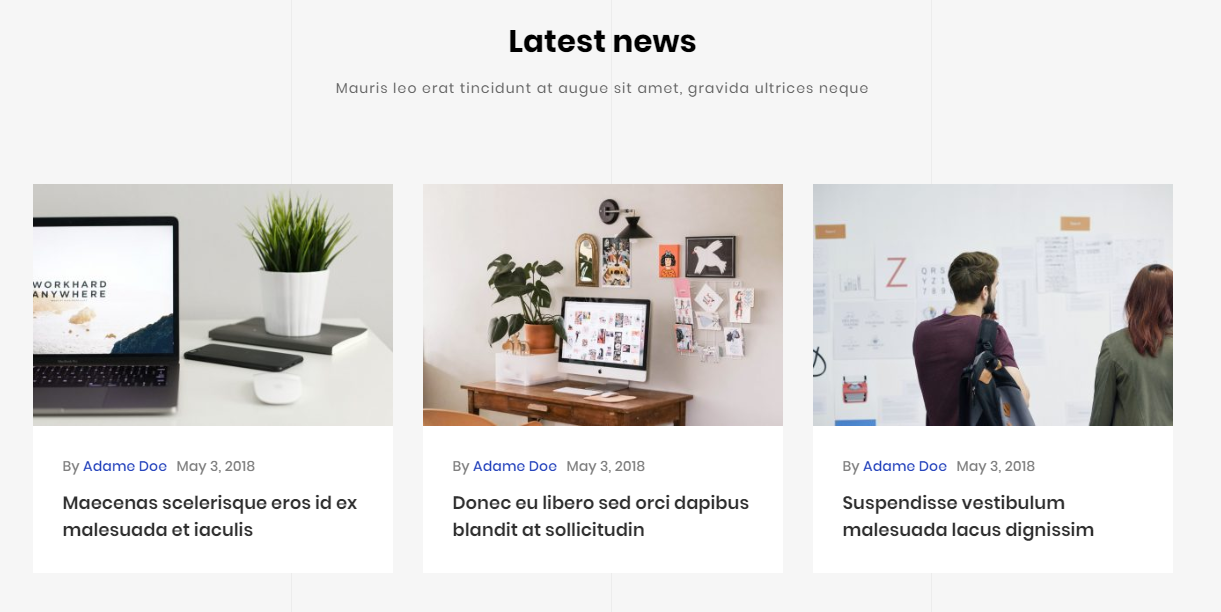
6. Latest News
Built-in Section
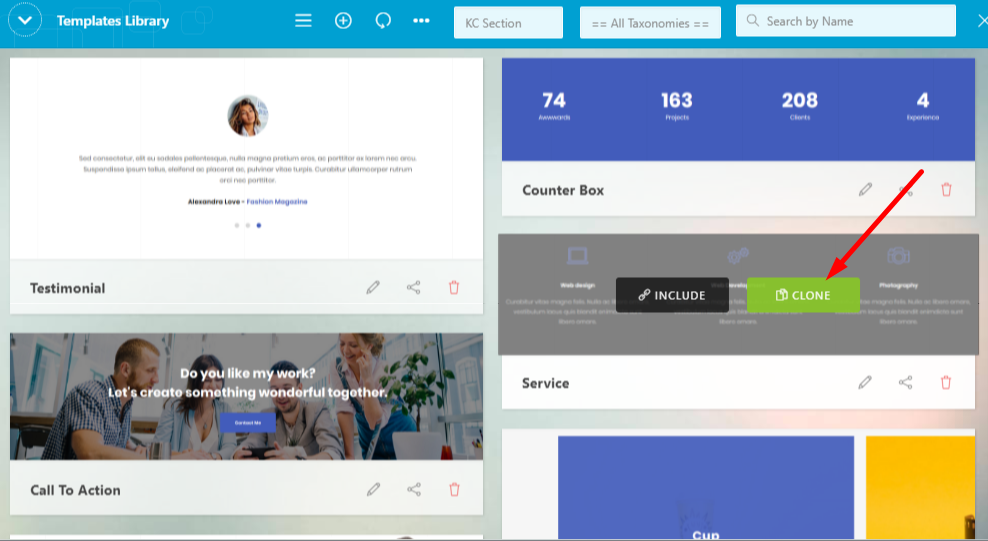
To reduce your task we already added built-in section. So that you can easily add it.
- Click On Sections/Templates Library Icon
- Click on CLONE button
- It will append the section
You can add built-in section look like the following screenshot.

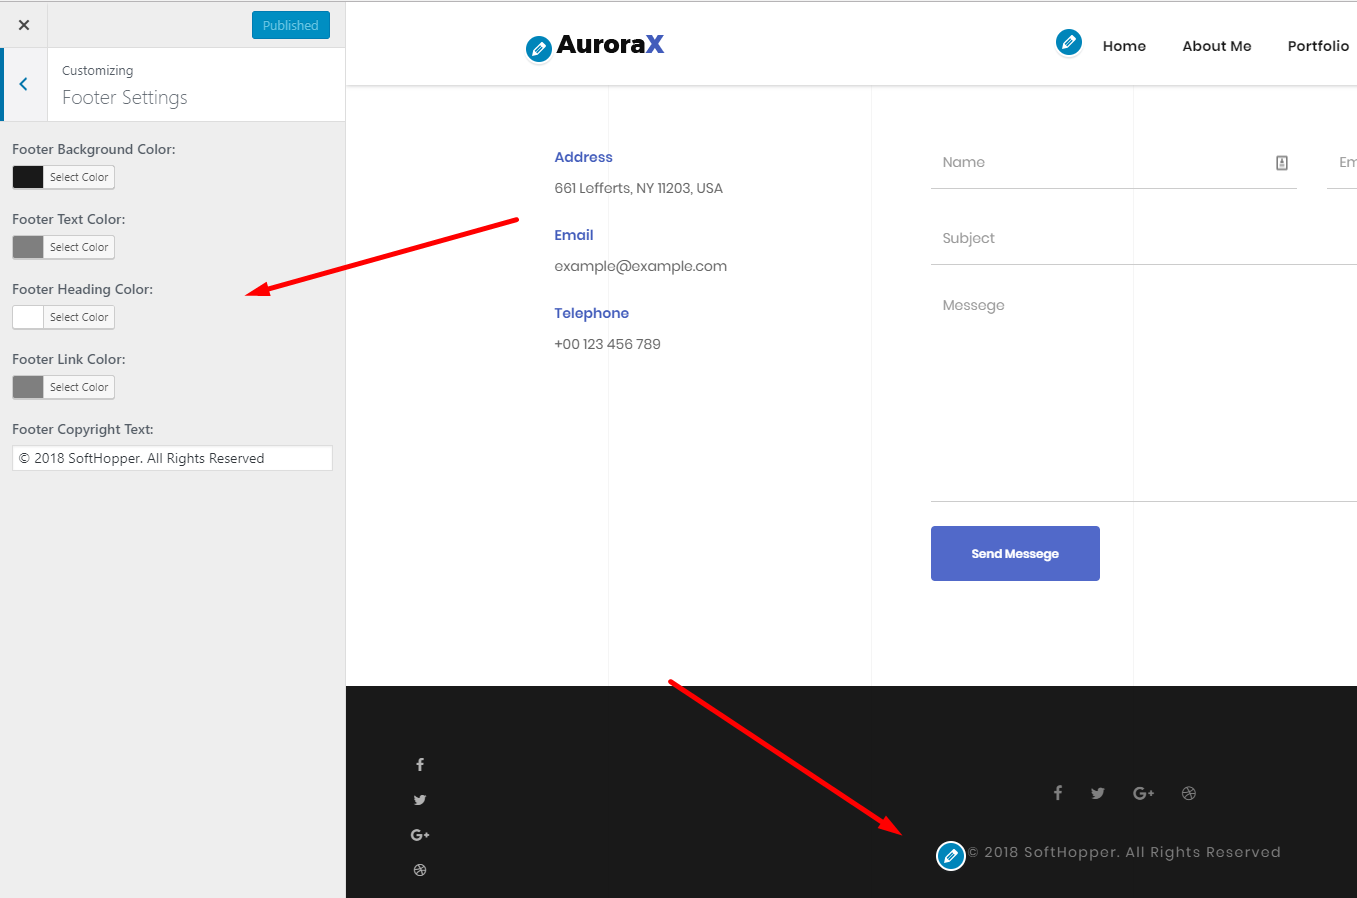
Footer Section
How to manage Footer Section
From admin dashboard go to Appearance > Customize
Footer Section Settings Look like the screenshot, You can manage footer section settings from here
Translation
Tell WordPress which language file to use.
If you don’t use WordPress in your native language so far, you have to tell WordPress which language to use to activate the theme translation.
You can do this by editing the wp-config.php file (the file is located in the main directory of your WordPress files) and defining the WPLANG constant. You have to set your language code there, for example, fr_FR for the French translation.
just add the line below to your wp-config.php or change it if it already exists:
define ('WPLANG', 'fr_FR');
First Method: Using Loco Translate Plugin
The easiest way to translate your theme locally is by using the Loco Translate plugin. After you have installed and activated the plugin, simply Go to Loco Translate > Home in the left-hand menu to start translating. You can get some guideline beginners here
Second Method: Using Poedit
Poedit is a common program which you can use to translate the theme. It’s available for free on poedit.net. After you have installed Poedit, you can open it and select File > New Catalog from POT file. Then select the .pot file from the theme you wish to translate which you can find in the /languages/ folder of theme. Then go through every line of text and translate it to your native language. Afterward, you can save the catalog with your language code (for example es_ES.po). Normally Poedit automatically creates the .mo file and saves it, too. The last step you have to do is to upload your created language files to the language folder of your theme using FTP.
Sources and Credits
I've used the following images, icons or other files as listed.
WORDPRESS PLUGINS & LIBRARIES
- Unyson Framework - http://unyson.io/
- TGM-Plugin-Activation - https://github.com/thomasgriffin/TGM-Plugin-Activation
JAVASCRIPT / JQUERY PLUGINS
- bootstrap.js / bootstrap.min.js - Core Bootstrap 3 - http://www.getbootstrap.com
- aurorax.js - Core aurorax Theme Javascripts
- owl.carousel.js - Item Slider Script - http://owlgraphic.com/owlcarousel/
- Fitvids- For video - http://fitvidsjs.com/
- modernizr- for html5 and css3 - http://modernizr.com/
- SmoothScroll - https://github.com/galambalazs/smoothscroll
- Jquery - http://jquery.com/
CSS PLUGINS
- bootstrap.min.css - Core Bootstrap 3 Styles
- (Recommendation - Do not edit this file but rather copy the classes you wish to change and paste them into style.css)
- owl.carusol.css and owl.transition.css - For owl carusol
- font-awesome.css - FontAwesome Icons
- aurorax-icon.css - For aurorax icon
Once again, thank you so much for purchasing this theme. As I said at the beginning, I'd be glad to help you if you have any questions relating to this theme. No guarantees, but I'll do my best to assist. If you have a more general question relating to the themes on ThemeForest, you might consider visiting the forums and asking your question in the "Item Discussion" section.
SoftHopper